REVIEW · SAN FRANCISCO
San Francisco Private Group City Tour – Lucky Tuk Tuk
Book on Viator →Operated by Lucky Tuk Tuk Tours San Francisco · Bookable on Viator
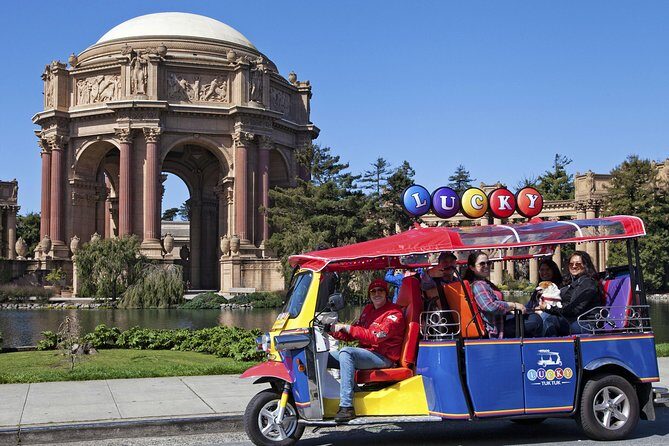
San Francisco comes fast on three wheels. The Lucky Tuk Tuk Private Group City Tour is a smart way to see major sights without wasting time on parking or buses, and it’s built around private attention and photo stops timed to what your group wants.
I especially like the way guides work with your priorities, from classic landmarks to film-and-fan moments. You’re not stuck with a rigid script.
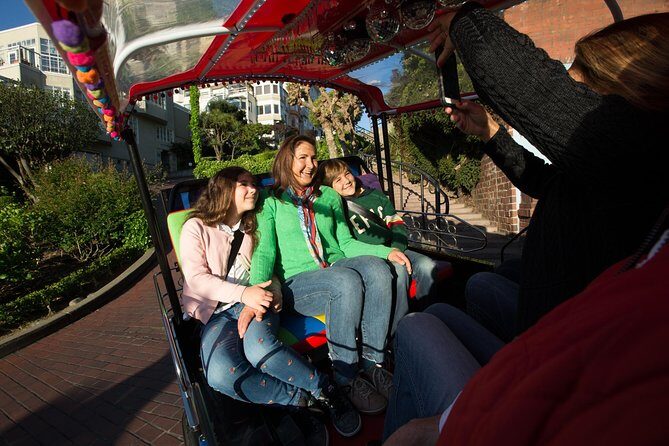
I also love the heated seats and the included blankets for chilly bay air. On an open-air ride, that small comfort upgrade makes a big difference when fog rolls in, and guides like Brian and Anthony are praised for keeping the experience fun even when the weather is on the cool side.
One thing to consider: you mainly stop for views and photos, and you typically do not enter museums or attractions. Also, timing can shift with traffic, like the route around Lombard Street, so think of this as flexible sightseeing rather than a checklist with guaranteed entrance times.
In This Review
- Key highlights worth caring about
- Why Lucky Tuk Tuk beats hopping between transit and taxis
- The comfort strategy: heated seats, blankets, and open-air planning
- Picking the right length: 2 hours vs 2.5 vs 3 hours
- Hyde Street Pier to the marina: waterfront views without the stress
- Fort Point, Marina Green, and the bridge angles you actually need
- Presidio pacing: forests, beaches, and history in motion
- Downtown-to-North Beach: Chinatown, Coit Tower, and Lombard Street thrills
- Fisherman’s Wharf and the Embarcadero: sea lions, chocolate, and waterfront momentum
- Optional longer-route add-ons: Haight-Ashbury, Japantown, Lands End, and Sutro Baths
- Price and value: what $189 per person buys you in SF
- Who should book this tour, and who should skip it
- Quick decision: should you book Lucky Tuk Tuk?
- FAQ
- How long is the Lucky Tuk Tuk private city tour?
- What’s included in the tour price?
- Do we go inside museums or attractions during the tour?
- Is this tour private or shared?
- What ages can join?
- Where do we meet?
Key highlights worth caring about
- Heated seats + blankets for San Francisco fog days
- Small private Tuk Tuk setup for groups (up to 6 per vehicle)
- Guides who tailor the day, including photo-taking for your group
- Lots of quick pull-offs for iconic shots across multiple neighborhoods
- Open-air views that beat sitting in a windowless car all day
Why Lucky Tuk Tuk beats hopping between transit and taxis
San Francisco is built for viewpoints and angles. The city also punishes slow movement with hills, traffic, and long waits. A private Tuk Tuk tour helps you cover ground efficiently while still feeling like you’re touring with a local friend.
Because it’s private, you can set the tone early. If your group is photo-focused, you’ll get more time at the best angles. If you care more about history, you’ll get the story threads tied to what you’re looking at. Reviews specifically highlight that guides like Meera, Jojo, Edith, and Katya adjust the route for their group’s interests instead of forcing everyone down the same path.
This is also one of the easier ways to see a lot in one afternoon without turning your day into a walking test. The ride is open-air, so you get the “I’m actually in SF” feeling, but you’re not doing constant stairs and steep blocks.
You can also read our reviews of more city tours in San Francisco


The comfort strategy: heated seats, blankets, and open-air planning
This tour is designed for San Francisco weather, not in spite of it. You’ll ride in an open-air Tuk Tuk, which is great for views, but it can get cold fast near the bay. That’s where the included warm blankets matter.
The heated seats are the kind of detail that sounds small until you’re sitting near Crissy Field or along the Golden Gate approaches with fog in the air. One review even praised blankets for a chilly day where fog made the ride feel extra cold—yet the comfort upgrades kept everyone smiling.
I’d still dress like you’re expecting a “cool coat day.” Even with blankets, wind off the water can be brisk. Bring layers so you can adjust, and you’ll stay comfortable from the marina to the bridge.
There’s one more practical note: in at least one case, the operator offered a Jeep alternative when the Tuk Tuk wasn’t available due to weather or service. That’s not something you should bet your day on, but it’s good to know you may not be left stranded if conditions are rough.
Picking the right length: 2 hours vs 2.5 vs 3 hours
You can book this tour in a range of lengths, roughly 2 to 3 hours, with extra options depending on your route choice. Here’s how to think about the difference.
- 2-hour route: It’s focused on the big headline stops: Golden Gate Bridge area highlights, and then down through neighborhoods like Little Italy (North Beach), Chinatown, and the Fisherman’s Wharf zone.
- 2.5-hour route: You keep the main sights, then add in select optional photo stops like Alamo Square and the Painted Ladies, plus extra time for a couple of viewpoints.
- 3-hour route: You get the most “loop” time: more neighborhoods, more coastal perspective, and extra optional areas like Haight-Ashbury and Japantown. This is also where you’re most likely to see Lands End and Sutro Baths-type stops.
In real life, traffic and timing can shift short pull-offs by a few minutes. Plan your day so this tour isn’t the only timed reservation you have.
If you’re in town for only a short window and want maximum overview, go longer. If you’re landing in SF with limited stamina or you want a quick introduction before dinner, the 2-hour option often hits the sweet spot.
Hyde Street Pier to the marina: waterfront views without the stress
You start near 2870 Hyde St and finish back at the meeting point. From there, the early part of the drive sets your “San Francisco vibe.”
A key stretch passes by the San Francisco Maritime National Historical Park area near Hyde Street Pier. Even when you don’t get out to explore, the historic ships in the harbor are worth the glance—they’re the kind of visual texture you don’t get on a quick city bus.
Next, you cruise the waterfront toward places like Aquatic Park and the Maritime Museum bathhouse building area. Again, the value here is the pass-by perspective: bay views plus the big maritime architecture in one sweep.
Then comes the Wharf-to-Marina feel as you approach the Ghirardelli Square area and Fort Mason viewpoints. Fort Mason’s Great Meadow is especially helpful for skyline and bridge framing. Even without a long walk, the viewpoint from the route gives you an easy mental map for where you’ll want to stroll later.
From there, you enter the Marina District vibe and stop at Marina Green, where you can stretch and grab bridge-and-bay photos. If you’re doing this tour early in your trip, this is a great time to decide what you want to revisit on foot later.
Fort Point, Marina Green, and the bridge angles you actually need
One of the most rewarding parts of this tour is how it handles the Golden Gate Bridge from multiple angles without requiring you to hike between overlooks.
You’ll get a Fort Point stop beneath the bridge. Fort Point is Civil War-era brick fortification, and the location gives you that rare perspective where the bridge feels like it’s towering directly over your head. It’s also a very clean photo moment: the fort’s geometry plus the bridge structure makes for photos that look like you went somewhere far away.
Depending on your route length, you may also have a quick photo stop at Golden Gate Overlook, which gives a broad panoramic view of the bridge and the water. That stop is short, but it’s the kind of quick payoff that makes a tour like this feel worth doing.
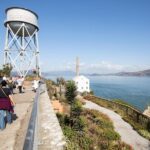
If you time it right, you can also catch Alcatraz Island framed from different viewpoints as you travel through the city and toward the Presidio side. The island’s shape and the bay’s light do a lot of the storytelling for you.
You can also read our reviews of more private tours in San Francisco


Presidio pacing: forests, beaches, and history in motion
The Presidio portion of the tour is where your “drive-by sightseeing” starts feeling like a real experience. You pass through areas that used to be military ground, with different kinds of open spaces and architecture you can spot from the road.
On this route, you’ll see key Presidio areas like:
- historic-era structures and different road corridors
- coastline views and Presidio beaches
- glimpses of the National Cemetery area (you won’t stop)
There are also stop opportunities that make the scenery feel human-scale. A good example is Crissy Field Marsh/Golden Gate Promenade area—you see the restored wetland concept and get that wet, wind-bright feeling of the bay edge. If you’ve been stuck in indoor museums all day, this is the palate cleanser.
You might also pass by the Presidio Tunnel Tops area from the road. It’s newer, and it’s designed as an elevated green space above the roadway, which means it gives another style of viewpoint over the city and bridge.
If you want a “walk later” target, this part of the tour gives you enough visual cues to choose your own short stroll after you’re done riding.
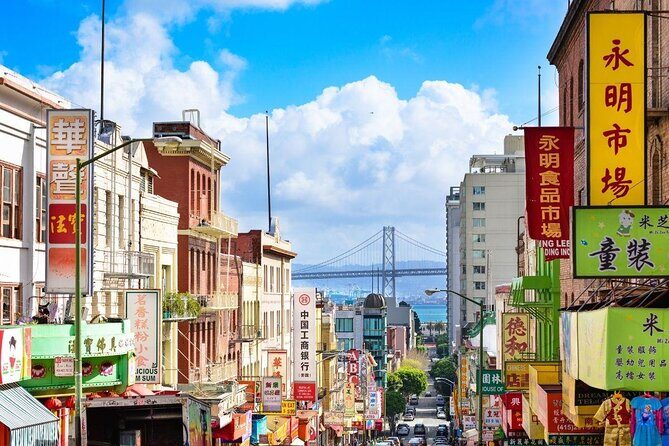
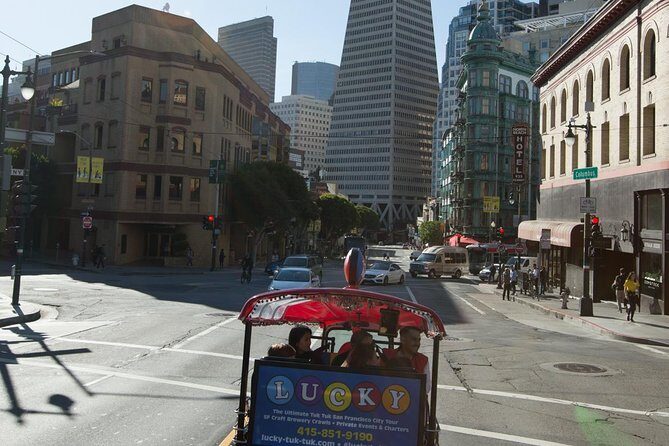
Downtown-to-North Beach: Chinatown, Coit Tower, and Lombard Street thrills
After the waterfront loop, the tour turns into a neighborhood drive that helps you understand what SF feels like block by block.
You’ll go through the Chinatown area along Grant Avenue, including the iconic Dragon’s Gate. The value here is not just seeing the gateway—it’s the sense of how shops, signage, and street layout create a living district. You’ll also see references to key Chinatown anchors like Portsmouth Square as part of the drive.
Next, you roll toward the Telegraph Hill / North Beach area. Optional stops can include Telegraph Hill (for views and the Coit Tower area), and on the longer routes you may also get a stop at Coit Tower. The tower is Art Deco with Depression-era murals inside, so it works as both a photo-and-history stop. Even if you only have a brief window, it’s one of the most useful “SF orientation” points you can hit in a short day.
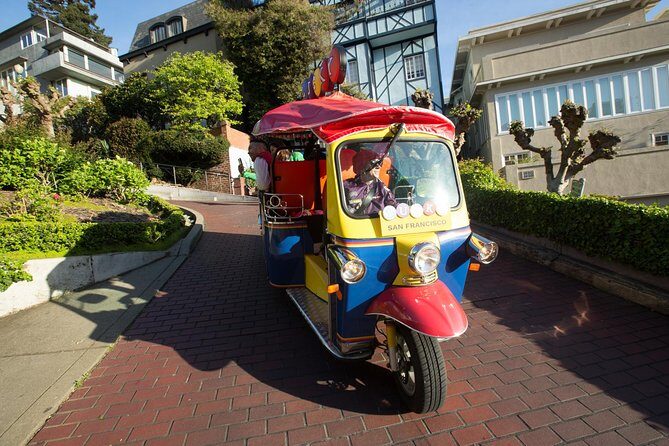
Then comes the big stomach-flip: Lombard Street—the crooked, zigzagging stretch. The tour includes a stop at Lombard and driving down it, but traffic can affect whether you get the full experience. I’d plan this as a highlight, not a guaranteed ride, and keep your head in the game if you’re in a hurry.
As you pass Russian Hill and North Beach landmarks like the St. Mary church area, you’ll get that mix of hill streets, charming architecture, and the feeling that SF is always curving upward or downward.
Fisherman’s Wharf and the Embarcadero: sea lions, chocolate, and waterfront momentum
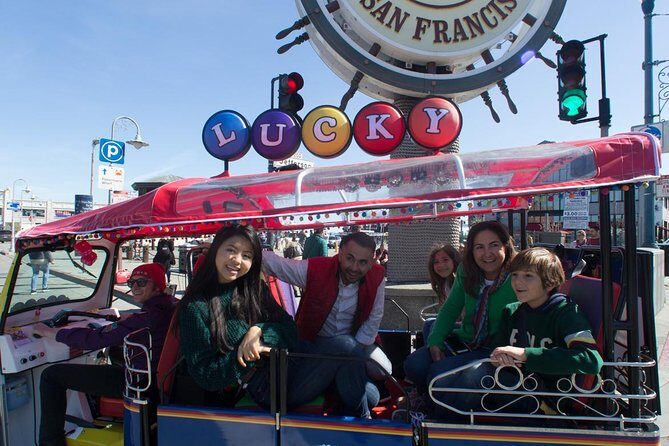
This tour doesn’t forget the classic tourist zone. You pass by Pier 39 and Fisherman’s Wharf areas, where the sea lion docks and the waterfront energy make it a hard place to ignore.
You’ll get a view of Ghirardelli Square too, which is perfect if you want a quick chocolate stop later. The tour itself typically keeps things in motion, but it drops you right near the places you might want to linger after.
One practical benefit of this section: it helps you choose your next meal and your next stroll. If you know you’ll want seafood, chowder, or quick snacks, you can map the best places while the guide is already pointing everything out.
You’ll also pass by Musée Mécanique at Pier 45, a vintage arcade-style museum area. You usually won’t enter, but it’s the kind of place you’ll remember the moment you spot it, so you can plan a follow-up on your own.
Later, you may also end near Umbrella Alley in the Wharf area. It’s known for colorful umbrellas and murals. The tour notes that it’s reopening at a new location around mid-September 2025, so if your dates are near then, it’s worth keeping in mind as a photo target.
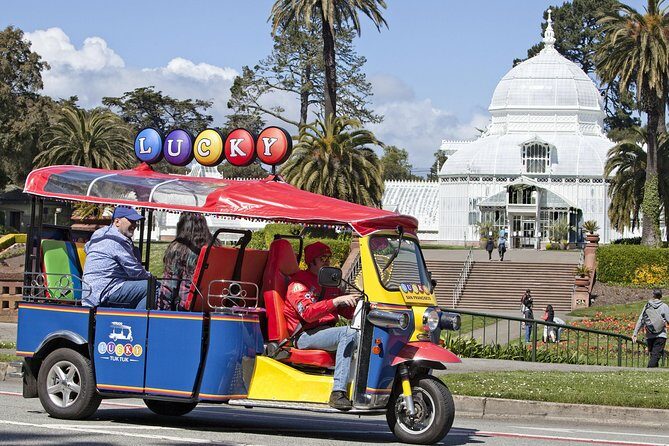
Then the route continues along The Embarcadero, where you get the long waterfront boulevard perspective. If you’re doing the 2.5 or 3-hour route, Ferry Building Marketplace may be part of your optional time. Even if you don’t plan to shop, it’s a strong visual anchor: historic architecture plus modern food stalls.
Optional longer-route add-ons: Haight-Ashbury, Japantown, Lands End, and Sutro Baths
The 3-hour route is where SF starts to feel like a full city loop rather than a downtown-plus-waterfront sweep.
On longer itineraries, you might pass through:
- Haight-Ashbury and Haight Street, tied to 1960s counterculture scenes, murals, and vintage storefront energy
- Japantown, including the Peace Pagoda as a landmark you’ll spot as you go by
These sections work well for people who don’t just want photos of landmarks—they want the mood of different neighborhoods. You’re getting city context, not only postcard views.
For coastal drama, you may also go toward Lands End and potentially the Sutro Baths area on the way. Lands End is rugged coastal scenery, and Sutro Baths are atmospheric oceanfront ruins. The stops here are shorter, so you won’t get a long hike, but you’ll get that cliff-and-ocean framing that makes SF feel different from other U.S. coastal cities.
Another reason I like these optional add-ons: they give you choices after the tour. If Lands End clicks with you, you’ll know where to return for a longer walk later.
Price and value: what $189 per person buys you in SF
At $189 per person, this tour is not the cheapest way to see the city. But it can be good value when you compare it to the real cost of doing San Francisco like a typical group: multiple taxis/rides, entry fees, and wasted time chasing places across neighborhoods.
Here’s the value logic I’d use:
- You’re paying for a private guide and a ride that’s sized for the route’s hills and viewpoints.
- You’re paying for time savings. In 2 to 3 hours, you can cover areas that would take much longer to stitch together on your own.
- You’re paying for the comfort details—especially heated seats and blankets—that prevent a cold, unpleasant day from ruining the sightseeing.
Also, the Tuk Tuks seat up to 6 guests, and the tour advertises group discounts. If your group fills more of the seats, the per-person value tends to feel better because you’re effectively sharing the cost of the vehicle experience.
Who should book this tour, and who should skip it
This private Lucky Tuk Tuk experience works best if you:
- want a guided overview early in your SF trip
- have limited time but still want multiple neighborhoods, not just one
- want open-air views without doing the hill marathon
- are traveling with kids, teens, or multiple generations and want everyone to be comfortable
It may be less ideal if you:
- want museums entered as part of the schedule, because you mainly pass by attractions rather than go inside
- hate short stops and prefer long guided walks
- need a strict itinerary with zero traffic timing variability
Quick decision: should you book Lucky Tuk Tuk?
Yes, I’d book it if you want to get your bearings fast and see the major photo angles with a guide who can adapt on the fly. It’s especially worth it for foggy days because the comfort setup (heated seats plus blankets) removes one of SF’s biggest annoyances.
If you already have a lot of plans that include long museum visits, consider booking this as a morning or early afternoon primer. That way, you’ll leave with a clearer map of what to do next.
FAQ
How long is the Lucky Tuk Tuk private city tour?
It runs about 2 to 3 hours, depending on the route option you choose (2-hour, 2.5-hour, or 3-hour).
What’s included in the tour price?
You get a fully guided private tour (2, 2.5, or 3 hours) led by a guide, plus an open-air Tuk Tuk ride with heated seats and included warm blankets. The tour also includes photo stops and a mobile ticket.
Do we go inside museums or attractions during the tour?
No. The tour is designed so you travel past major sights for views and photos, but you do not enter museums or attractions.
Is this tour private or shared?
It’s private. Only your group participates.
What ages can join?
Ages 5 and older are welcome on the private tours. Child and booster seats are not provided.
Where do we meet?
The tour starts at 2870 Hyde St, San Francisco, CA 94109, and ends back at the meeting point.