REVIEW · SAN FRANCISCO
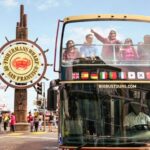
Monterey, Carmel and Pacific Coast Explorer from San Francisco
Book on Viator →Operated by Extranomical Tours · Bookable on Viator
One day, three coast icons. You get the famous Monterey Bay area, the candy-store scenery of Carmel-by-the-Sea, and photo stops on the 17-Mile Drive without renting a car. It’s the kind of route that feels scenic even when you’re just watching the fog roll in.
I especially love the way this tour mixes short, worthwhile stops with real time to walk. Cannery Row is built for wandering, and the aquarium option lets you choose how you want to spend your Monterey time.
One possible drawback: the schedule is packed, and if you want lots of time in one place (Monterey or Carmel), you may feel like the day is moving. Also, the transport comfort can vary by vehicle, so it’s worth going in with that in mind.
In This Review
- Quick hits before you go
- Price and what you actually get for $134
- Morning logistics: leaving San Francisco around 7:30 a.m.
- Davenport stretch break and the Highway 1 fog reality check
- Monterey Bay views: where the day starts to feel like California
- Aquarium vs lunch: your Monterey Bay trade-off
- The 17-Mile Drive: Lone Cypress and the camera stops that matter
- Carmel-by-the-Sea: what an hour feels like (and how to use it)
- Comfort, vehicle size, and the one thing to watch
- Who this tour is perfect for
- Who might want to skip or adjust expectations
- Should you book this Monterey, Carmel, Pacific Coast Explorer?
- FAQ
- What time does the tour start?
- How long is the tour?
- Where does pickup happen?
- What’s included in the price?
- Is the Monterey Bay Aquarium ticket included?
- Are meals included?
- How many people are on the tour?
- Are service animals allowed?
- What happens if weather is poor?
Quick hits before you go
- Pickup from Union Square and Fisherman’s Wharf areas makes it easier than trying to self-drive
- Morning Highway 1 run with a Davenport stretch stop helps break up the trip
- Monterey Bay + Cannery Row gives you both ocean views and waterfront town energy
- 17-Mile Drive included with big-name photo moments like the Lone Cypress
- Carmel-by-the-Sea time on Ocean Avenue and the beach for shopping + walking
- Max 50 travelers and free Wi‑Fi onboard (so you can plan meals and breaks)
Price and what you actually get for $134
At $134 per person for an 11–12 hour day, this tour is priced like a full-day “coast package,” not a quick shuttle. The value comes from the stuff that’s hard to DIY in one stretch: hotel-area pickup, guided narration during the drive, and a big chunk of sightseeing that would otherwise take planning and parking stress.
The best part for your budget is what’s included:
- Pickup/drop-off from convenient SF areas
- Expert guide commentary
- Free Wi‑Fi
- 17-Mile Drive admission
What’s not included is also straightforward: meals and the Monterey Bay Aquarium ticket. If you want seafood lunch and an aquarium visit, you should expect extra spending. If you pack a lunch and skip the aquarium, the day still works—because the itinerary includes enough free walking time in Monterey and Carmel.
You can also read our reviews of more tours and experiences in San Francisco.


Morning logistics: leaving San Francisco around 7:30 a.m.
This is a morning-start tour (7:30 a.m.). You’ll be picked up in the downtown/Union Square area or around Fisherman’s Wharf, depending on where you’re staying. The idea is simple: you’re on the road early enough to enjoy the coast before the day gets fully hectic.
A practical tip: bring a layer. Even when it’s bright in San Francisco, the coast can shift fast. The drive runs along CA Highway 1, and you’re told to expect fog to influence visibility.
After pickup, you’ll settle into the vehicle and get commentary during the scenic ride. Then you’ll have at least one planned break to stretch your legs (more on that below), before Monterey.
Davenport stretch break and the Highway 1 fog reality check
Early in the trip you stop briefly around Davenport for a legs-stretch break. This is one of those “small but useful” moments. It breaks up the long ride and gives you a quick chance to grab coffee or a snack if you want one.
Now the fog piece: the coast can look dramatic even when visibility is low. But if you’re hoping for sharp, distant views, fog permitting is the truth. That means your best photo results may depend on the day’s conditions—not on your camera.
If you tend to get impatient waiting for viewpoints, the good news is that the later stops are built around places where you can still see something even when the sky is gray. The 17-Mile Drive pullouts are the big payoff.
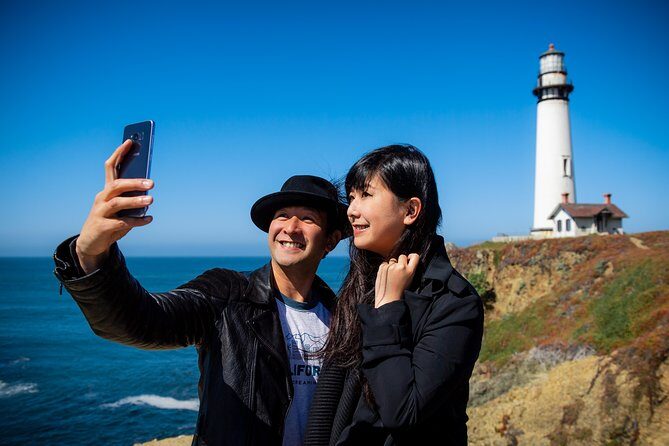
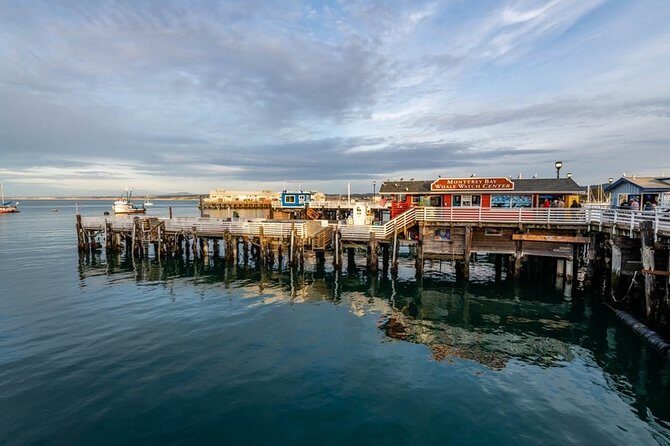
Monterey Bay views: where the day starts to feel like California
Monterey’s first stop focuses on Monterey Bay, with about an hour on the ground and no admission fee. This is where you get oriented—ocean first, town second. If you’re new to this stretch of coast, it helps you understand why Monterey has such a “real ocean town” feel.
Then the day layers in the history and waterfront energy at:
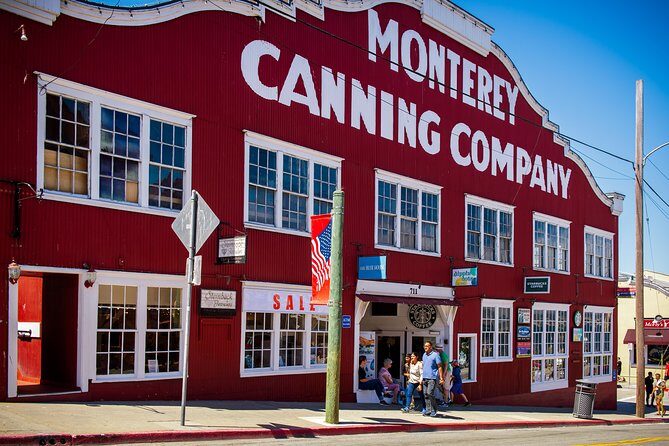
- Cannery Row (again, about an hour, free to walk)
Cannery Row is not just a street—it’s a whole waterfront vibe. You’ll see a working coastline feel, with restaurants and hotels occupying many former cannery buildings, and some fishing activity still happening nearby. Even if you’re not doing a museum, it’s easy to wander with your own pace.
The practical catch is time: Monterey is split across bay views, Cannery Row, and the optional aquarium. So you’ll want to decide early how you want the day to feel.
Aquarium vs lunch: your Monterey Bay trade-off

Here’s the most important decision point in the itinerary: the Monterey Bay Aquarium is available for about an hour, but admission is not included.
You’re given two ways to handle it:
- If you want the aquarium, plan to work it in during your Monterey window, and expect less time for a long lunch.
- If you’d rather do a relaxed seafood lunch on Cannery Row (at your expense), you can skip the aquarium and enjoy a more leisurely stroll.
The aquarium stop is one of the reasons this tour appeals to first-timers, because it’s a “worth paying for” kind of attraction if marine life is your thing. But if your focus is mainly towns and viewpoints, the free walks in Monterey and the later 17-Mile Drive scenery can still deliver a great day.


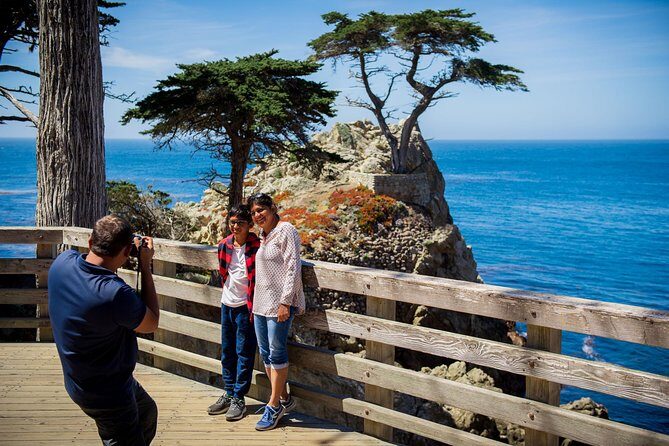
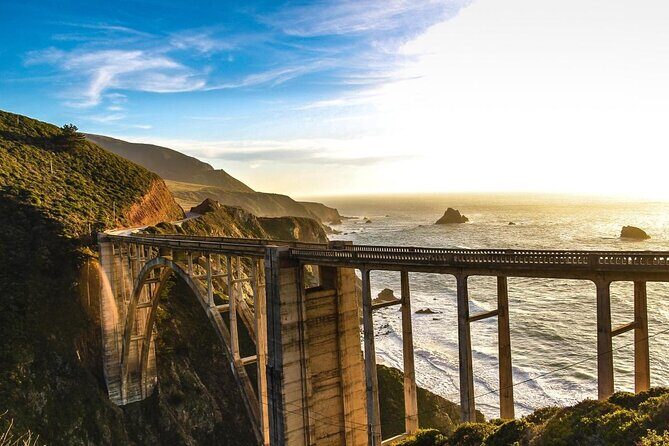
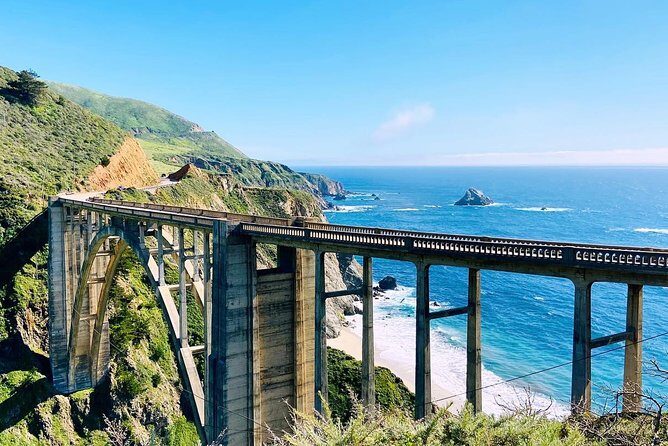
The 17-Mile Drive: Lone Cypress and the camera stops that matter
This is the headline section of the tour for most people. 17-Mile Drive is included (about 90 minutes), and it’s packed with classic scenery: coastline, cliff views, and estate-like properties along the route.
You’ll hit several signature photo moments, including:
- The Lone Cypress (a short stop, about 15 minutes, free)
- Pebble Beach Village for a look around, including the 18th green area (time is part of the 17-Mile Drive segment)
You’re also set up for more coastal outlooks as the drive continues, with listed viewpoints and marine-protected areas in the mix. The schedule also includes multiple quick stops for photos—so if you like variety (instead of one long walk), you’re in the right place.
One practical note: on an active coastal road, you won’t be sightseeing like you’re on your own timeline. Your enjoyment depends on whether you like quick “look, photograph, move” rhythms. If you do, this section is a gift.
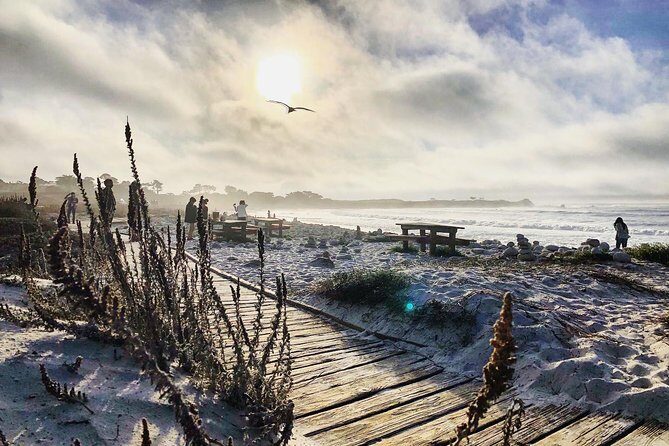
Carmel-by-the-Sea: what an hour feels like (and how to use it)
Carmel-by-the-Sea is the other big emotional hit in the day. The tour gives you about an hour here, free to explore.
What you’ll do with that hour is up to you, but the town naturally breaks into two choices:
- Beach time (walking the shoreline area)
- Town time along Ocean Avenue, where shops and restaurants make it easy to browse without a plan
Carmel’s charm is partly in its compact shape. Even within a short window, you can get a real sense of the place. If you want souvenirs or a relaxed coffee break, this is where you’ll spend your momentum.
The limitation is obvious: an hour passes fast, and the day is moving toward the return to San Francisco. If you’re the type who loves long wandering sessions, Monterey plus 17-Mile Drive may already satisfy your walking appetite—and Carmel becomes the “light snack” version of exploring.
Comfort, vehicle size, and the one thing to watch
This kind of tour is usually comfortable, and the listing says the ride is in a comfortable vehicle with free Wi‑Fi. In practice, though, vehicle size can vary. Some recent experiences describe everything from a proper coach setup to smaller vans that felt tight and harder to see from.
So here’s my honest advice: if you’re sensitive to cramped seating or you care a lot about window views, bring that up in your own planning mindset. This isn’t a “private car” experience.
Also consider your tolerance for roadside motion. The coast route involves winding roads and changing weather. Some departures are praised for smooth, safe driving, while a few note concerns about speed or vehicle handling. You can’t control the driver, but you can decide if you’re comfortable with a full-day highway plan where traffic and weather can change the feel of the drive.
Who this tour is perfect for
This is a strong match if you:
- Want Monterey + Carmel + 17-Mile Drive in one day without driving yourself
- Love scenic viewpoints and short walking loops more than one long hike
- Are traveling solo, as a couple, or with family and want a guided structure
- Like golf sights enough to appreciate the Pebble Beach stop—even if you don’t play
It’s also a good pick for people who are new to California’s coast. The day gives you a clear taste of the region’s different moods: ocean bay energy, waterfront historic town, and then high-visual “coast road” stops.
Who might want to skip or adjust expectations
Consider skipping this specific tour if:
- You need lots of time in one town. The schedule gives you limited windows (roughly short stays in Monterey and Carmel).
- You’re counting on the aquarium to be a leisurely visit. The ticketed stop is only about an hour, so it’s more “highlights” than “slow exploration.”
- You’re very picky about vehicle comfort. If you’re expecting a large, roomy coach, go in knowing the tour can run in different vehicle types.
Should you book this Monterey, Carmel, Pacific Coast Explorer?
I’d book it if you want a coast day that’s mostly about big views and walkable highlights: Cannery Row for waterfront energy, 17-Mile Drive for the iconic photo stops, and Carmel for that quaint beach-town feel.
I wouldn’t book it if your top priority is deep, unhurried time in Monterey or Carmel. In that case, you might get better results with a flexible plan where you can linger and return later on your own timing.
If you do book, my best advice is simple: decide ahead of time whether the Monterey Bay Aquarium is a must for you. Then build your expectations around short, purposeful stops—because this tour’s strength is packing the coast’s best hits into one long day.
FAQ
What time does the tour start?
The tour starts at 7:30 a.m.
How long is the tour?
It runs for approximately 11 to 12 hours.
Where does pickup happen?
You’ll be picked up from convenient locations in the Union Square area and near Fisherman’s Wharf. You’ll be ready for pickup at your San Francisco hotel in the downtown or Fisherman’s Wharf area.
What’s included in the price?
The tour includes expert guide commentary, pickup and drop-off, free Wi‑Fi on the vehicle, and admission to the 17-Mile Drive.
Is the Monterey Bay Aquarium ticket included?
No. The aquarium is listed as not included and you’d need to buy a ticket if you want to go.
Are meals included?
No. Meals are not included, and you can purchase food throughout the day.
How many people are on the tour?
The tour has a maximum of 50 travelers.
Are service animals allowed?
Yes. Service animals are allowed.
What happens if weather is poor?
This experience requires good weather. If it’s canceled due to poor weather, you’ll be offered a different date or a full refund.