REVIEW · SAN FRANCISCO
San Francisco: Gold, Greed, and Gunslingers Walking Tour
Book on GetYourGuide →Operated by Junket · Bookable on GetYourGuide
San Francisco has a second, uglier pulse. This Gold, Greed, and Gunslingers walking tour turns the Barbary Coast era into real street-level stories, from the Chinatown edge to Pier 7, led by a guide who explains how the city’s past still shows up today. I love the story-first scenes—shanghaied sailors and doomed romance—and I like the local, practical tips that help you see the neighborhood with new eyes.
One thing to plan for: it’s a true walking tour in hilly San Francisco, and it’s rain or shine. You should be comfortable with about a mile of walking and staying on your feet, since it’s not recommended for people who can’t manage that.
In This Review
- Key things that make this tour worth your time
- Turning the Barbary Coast into street-level reality
- Chinatown to Devil’s Acre: how the city tells you what happened
- The ship-hull saloon and the reality of shanghaied sailors
- Doomed romance: Arabella Ryan and James Cora
- Sam Brannon and The Hounds: gang wars with named players
- The 1906 earthquake survivor and what lies under Jackson Square
- Pier 7 finish: waterfront views after the dark stories
- Price, pacing, and why $35 can make sense
- Should you book this Gold, Greed, and Gunslingers tour?
- FAQ
- How long is the Gold, Greed, and Gunslingers walking tour?
- Where do I meet the tour guide?
- What language is the tour offered in?
- Does the tour run in rain?
- Is the tour suitable if I can’t walk more than a mile?
- Is the tour wheelchair accessible?
- What’s included in the price?
- Is hotel pickup or drop-off included?
- Are there rules about video, smoking, or alcohol?
Key things that make this tour worth your time

- Chinatown edge to Pier 7: you connect Gold Rush-era trouble to the waterfront view at the end.
- Street-level history: anti-immigrant sentiment and gang conflict are explained through architecture and place.
- Devil’s Acre and Sydney Town: two name-drops that point to specific, gritty chapters of the Barbary Coast.
- Shanghaied sailors in a ship-hull saloon: a vivid stop that makes the era feel physical.
- Real people and real conflicts: Arabella Ryan and James Cora, plus Sam Brannon vs. The Hounds.
- Small-group energy is possible: the vibe can feel more like an engaging chat than a lecture.
Turning the Barbary Coast into street-level reality
San Francisco is all curves, steep hills, and postcard views. But underneath the friendly face, there was a version of the city built on quick money, hard bargains, and people getting used. This tour leans straight into that older San Francisco—devilish, fast-moving, and often brutal—so you leave with a fuller understanding of why the city grew the way it did.
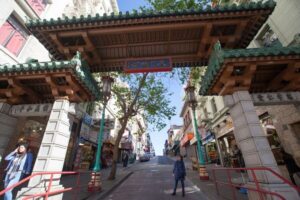
You start near Chinatown, and that matters. The guide frames the area as the setting for the Gold Rush city’s darkest habits, including anti-Chinese sentiment and the social friction that came with sudden wealth and sudden immigrants. Instead of tossing facts at you, the guide points out how the city’s layout and buildings can be read like a storybook—just not a happy one.
I also like that the tour doesn’t pretend history is clean. You’ll hear the kind of stories people often skip: shangling and forced labor, gang wars, and the way opportunists exploited the promise of gold. It’s not horror-movie scary; it’s more like learning where the city’s myths came from and who paid the price.
And yes, you’ll get your “guide-led” experience. This tour is led by a guide in a black US Ghost Adventures t-shirt who carries a lantern, which gives the whole walk a tone right away. It’s a simple touch, but it signals that this isn’t just dates and plaques.
You can also read our reviews of more walking tours in San Francisco


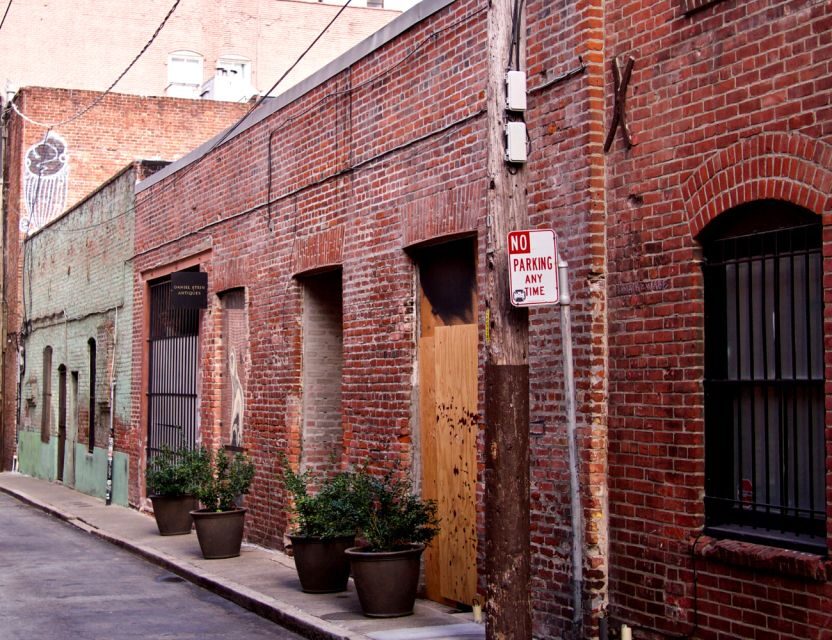
Chinatown to Devil’s Acre: how the city tells you what happened
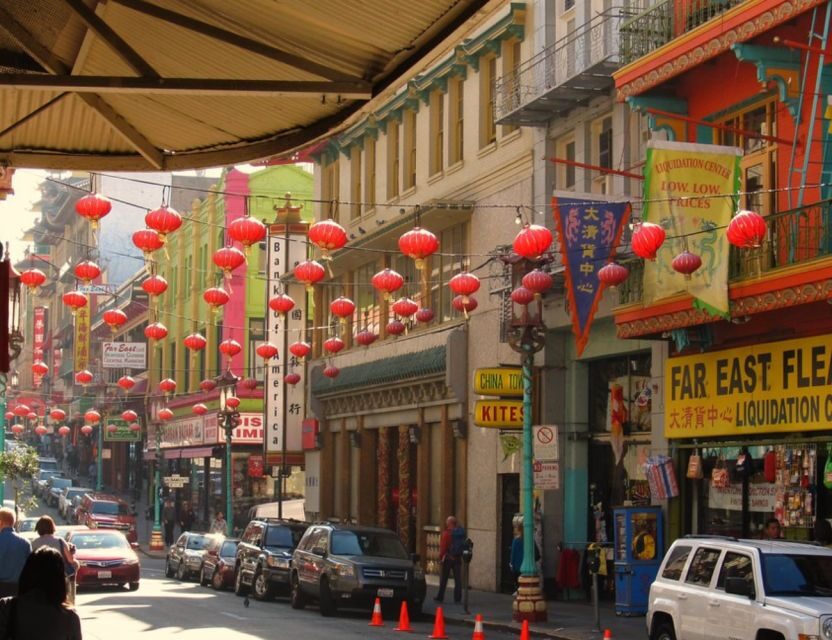
The meeting point is set up for easy arrival: outside the Hilton Financial District, at the intersection of Merchant and Kearny Streets. Plan to get there 15 minutes early so you’re not rushing at the start—San Francisco hills plus group timing can add up fast.
From there, the tour heads into the kind of geography that makes San Francisco history feel real. You’ll pass through areas tied to the Barbary Coast, and the guide connects the dots between the Gold Rush boom and the ugly human behavior it fueled. Gang conflict isn’t treated like trivia; you get the sense of what it meant to live with fear in a city still reinventing itself.
When the route turns toward areas named Devil’s Acre and Sydney Town, you’re not just hearing fun-era titles. Those names act like shortcuts to specific patterns: press-ganged labor, street fights, and power struggles over money and territory. The architecture becomes your visual guide—your “why does this building look like that?” question gets answered by the guide’s story.
If you enjoy history that feels lived-in, not museum-still, this part of the tour is strong. The best moments are when the guide ties the physical environment to human choices: who got targeted, who profited, and how quickly the city’s morality shifted based on opportunity.
One practical note: the walk is outdoors and you’re moving steadily. Bring comfortable shoes and expect a slow-and-steady pace rather than a rapid sprint from stop to stop.
The ship-hull saloon and the reality of shanghaied sailors
One stop is pure scene-setting: a saloon built into a ship’s hull. It sounds like a gimmick until the guide explains what it represents—how sailors were shanghaied, trapped, and pulled into years of hard labor.
This is where the tour’s tone matters. The stories aren’t told like sensational gossip; they’re framed as consequences. The guide helps you understand why forced labor was so attractive to criminals and profiteers in a boom economy. It also gives you a better lens for reading other coastal cities: when trade and immigration surge, exploitation follows.
You’ll also get more than the shock factor. The guide connects this to bigger themes that run through the whole tour, including greed and social control. In other words, you don’t just leave with one grim anecdote. You leave with a sense of how the city’s systems—work, migration, money—created openings for people willing to do terrible things.
I especially like this stop because it’s memorable in a practical way. When a place is built from the physical world of ships and harbor life, you stop imagining history as something distant. You can almost picture the smells, the fear, and the lack of options.
If you’re the kind of traveler who enjoys “that’s the spot where history happened,” this is one of your strongest photo-and-learning moments.
Doomed romance: Arabella Ryan and James Cora
Gold Rush cities didn’t just run on money and guns. They also ran on hope—and hope got weaponized. A major emotional stop on this walk centers on the tragic love story of Arabella Ryan and James Cora.
Stories like this can go one of two ways on tours: either they get treated like a sad detour, or they’re used to explain how social pressures shaped real lives. Here, the story works because it’s connected to the city’s larger atmosphere: the era’s constant tension, the lack of safety, and the way people’s reputations could decide their future.
What you’ll take from this segment is not just the names. You’ll walk away with a clearer picture of what the city demanded from people—socially, economically, and emotionally. The guide’s job is to keep it human, and the best kind of guide does that by anchoring the romance in the world around it.
Also, this is a good place for families and younger history lovers, if you’re traveling with them. The tour has a track record for keeping kids engaged, and this kind of story gives that energy a “follow the characters” feel rather than only a “listen to facts” feel.
It’s one of the stops that reminds you the Barbary Coast wasn’t only crime scenes. It was also ordinary people trying to make choices in a hard environment.
Sam Brannon and The Hounds: gang wars with named players

If you’re hoping for gunslingers and grit, this section delivers. You’ll learn about Sam Brannon and his fight with a notorious gang called The Hounds.
A lot of history tours talk about “gangs” like they’re a vague concept. This one names the conflict and ties it to the reality of a fast-changing city. That makes the gang warfare feel less like a legend and more like a symptom of the era’s pressure-cooker conditions.
The Gold Rush created enormous wealth—and huge gaps between those who controlled it and those who didn’t. In that kind of environment, groups formed quickly, violence became a tool, and power could shift fast. The guide’s stories help you understand why the fights weren’t random. They were part of a larger economic and social struggle.
This stop is also a great place to ask questions. The tour has a reputation for running as more of a conversation than a monologue, so if you’re curious about how the guide ties architecture, street names, and conflict together, this is where you’ll get the most out of it.
One reason this part stands out to me as practical is that it gives you names you can remember. When you leave with a few solid anchors—people, places, and conflicts—you’ll find it much easier to connect the dots while you explore the city on your own afterward.


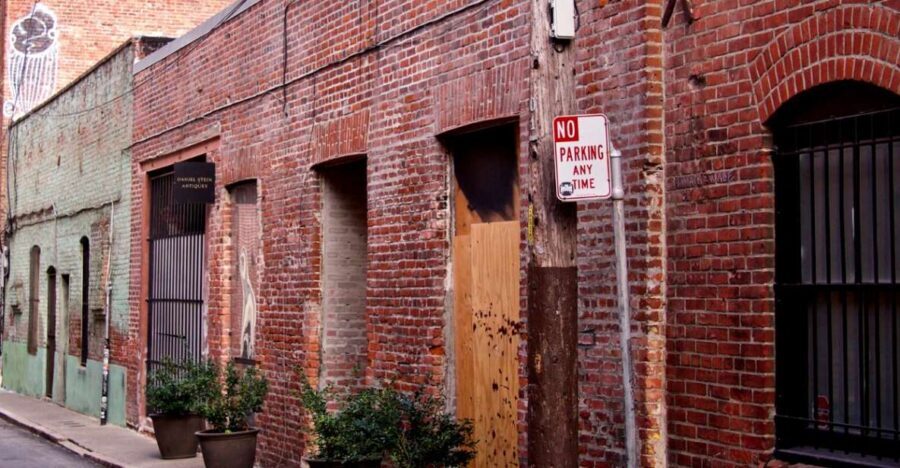
The 1906 earthquake survivor and what lies under Jackson Square
San Francisco has scars. The 1906 earthquake didn’t just reshape buildings; it reset the city’s trajectory. One highlight of this tour is strolling through the only neighborhood to survive the 1906 earthquake, which gives you a rare chance to feel how much history can be preserved through survival rather than museum protection.
The guide doesn’t treat this like a simple survival fact. You’ll hear how that survival changed what people built afterward, how the area carried older energy forward, and why it mattered in the story of a city that kept rebuilding while also trying to reinvent its image.
Then you hit another standout idea: the Jackson Square District, including what’s buried under the streets. That’s the tour’s best trick. It turns a normal street-walk into a “what’s underneath?” moment, so you start noticing how San Francisco layers time on top of time.
You’ll also get some context around Manifest Destiny and how the idea of national purpose got twisted in ways that justified greed and cruelty. This isn’t presented as a textbook lecture. It’s threaded into the stories about anti-immigrant sentiment, power, and the pursuit of gold.
If you like your walking tours with a little mystery, this segment delivers without needing spooky theatrics. It’s more “real-world haunting” than “jump-scare haunting.”
Pier 7 finish: waterfront views after the dark stories

All this heavy history can make a city feel heavy. The tour wisely balances the tone at the end. You finish with gorgeous waterfront views at Pier 7, which helps your brain process the walk as a whole: yes, San Francisco grew from greed and violence, but it also became the city people love today.
The waterfront stop is more than a scenic reward. It’s a reminder of why the Barbary Coast story mattered in the first place: ships, trade, labor, and migration. You can stand there and connect the old harbor reality to what San Francisco is now—still a port city, still a city of movement.
This ending also helps if you’re building a day plan. After two hours, you can keep exploring nearby without feeling like you still owe the city your full attention. You’ll have a story lens ready, so the rest of your walking feels smarter.
If you want your final moments to feel calm instead of exhausted, this is a good spot to slow down, take photos, and just watch the water for a few minutes. It’s a simple way to get the emotional payoff that the earlier stops set up.
Price, pacing, and why $35 can make sense

At $35 per person for a 2-hour walking tour, this is priced like a focused city experience rather than a long full-day excursion. The value comes from what you get in that time: multiple tightly connected stops, guided interpretation, and a story framework that ties Chinatown, the Barbary Coast, and the waterfront together.
You’re also not paying for transportation, since it’s a walking tour and hotel pickup/drop-off isn’t included. That actually keeps the price honest. You’re paying for the guide and the route, not for a bus ride you could skip.
One small operational plus: you skip the line through an express security check. That can matter in San Francisco, where time gets eaten by small delays. If you’re trying to fit tours into a tight schedule, that detail helps.
The biggest pacing consideration is physical. The tour isn’t recommended for people who can’t walk more than a mile, and it’s not suitable for people with mobility impairments. Even if wheelchair access is mentioned, treat the walking limit as the key info. If you have any doubts about hills and endurance, ask before you book.
If you’re the kind of traveler who likes interactive storytelling—especially with guides who keep the experience as a chat—you’ll probably get your money’s worth. The guides have a reputation for adjusting how they tell stories, including tailoring content when there’s only one participant, and for making history work for different ages (from a science-minded person to a 12-year-old who enjoys ghosty history themes).
For me, that balance is what makes this a solid deal: you don’t just get dark stories. You get explanations you can carry.
Should you book this Gold, Greed, and Gunslingers tour?

Book it if you want San Francisco with sharper edges. This is a good match if you’re curious about the Barbary Coast, the Gold Rush, and how prejudice and greed shaped daily life—especially if you like stories tied to actual places you can still stand on.
Skip it if you hate walking or if hills are a deal-breaker for your comfort. Also skip if you want purely cheerful landmarks and light commentary. This tour goes to the darker chapters on purpose.
Before you decide, think about your style of travel. If you enjoy a guide who can answer questions and keep the pace moving, you’re likely to have a better time than if you prefer passive museum-style listening. And if you want a tour that ends with real waterfront payoff instead of leaving you stuck in the middle of the city, this one is set up nicely.
If that sounds like your kind of day, I’d book it.
FAQ
How long is the Gold, Greed, and Gunslingers walking tour?
The tour lasts 2 hours.
Where do I meet the tour guide?
Meet in front of the Hilton Financial District at the intersection of Merchant and Kearny Streets. The guide wears a black US Ghost Adventures t-shirt and carries a lantern. Arrive 15 minutes early.
What language is the tour offered in?
The live tour guide speaks English.
Does the tour run in rain?
Yes. The tour takes place rain or shine.
Is the tour suitable if I can’t walk more than a mile?
It’s not recommended for people who cannot walk more than a mile.
Is the tour wheelchair accessible?
Wheelchair accessibility is listed, but the tour is also described as not suitable for people with mobility impairments and not recommended for those who can’t walk more than a mile. If you’re unsure, check with the operator about your specific needs.
What’s included in the price?
The ticket includes the walking tour and a guide.
Is hotel pickup or drop-off included?
No. Hotel pickup and drop-off aren’t included.
Are there rules about video, smoking, or alcohol?
Yes. Smoking, alcohol and drugs, and video recording are not allowed.