REVIEW · SAN FRANCISCO
Fisherman’s Wharf Walking Tour
Book on Viator →Operated by ExperienceFirst · Bookable on Viator
Fisherman’s Wharf is loud, but this walk adds sense. This guided route stitches together Bay views, old-school attractions, and two WWII ship stops without wasting time, so you get your bearings fast. I especially like the offbeat stops like Musée Mécanique and the submarines, plus the smooth pace that covers about 10 sights in just over an hour. The one drawback: most of the locations are close together, so if you’re hoping for a lot of deep, secret detail at each stop, you may feel a bit rushed.
You’ll start at 700 Beach St by the cable car turnaround, then swing through classic photo moments (yes, the Ghirardelli sign and the Golden Gate views) and end near Pier 39. The guide makes a big difference too; I’ve seen strong praise for guides such as Marie, John Hurst, Seth, and Jamie for clear history and keeping the group moving. If you’re prone to getting distracted by crowds or you want a slower wander, plan for that upfront.
In This Review
- Key Takeaways Before You Go
- A Fast Primer on Fisherman’s Wharf in 90 Minutes
- Meeting at 700 Beach St: How to Start Without Stress
- Aquatic Park to Cable Cars: Bay Views and SF Character
- The Ghirardelli Moment: A Picture, Then Real Context
- Golden Gate Bridge Views Without Losing Time
- The Cannery and Fisherman’s Wharf: History You Can Walk
- Musée Mécanique: The Quirky Arcade Stop That Works
- WWII Submarines: USS Pampanito and SS Jeremiah O’Brien
- Angel Island Immigration Station: The Ellis Island of the West
- Pier 39 Sea Lions: The Classic End-Spot
- Price and What $39 Really Buys You
- Group Size, Pace, and Why the Guide Matters
- Who This Tour Suits Best (and Who Might Skip It)
- Quick Practical Tips to Make It Better
- Should You Book This Fisherman’s Wharf Walking Tour?
- FAQ
- How long is the Fisherman’s Wharf walking tour?
- How much does the tour cost?
- Is the tour offered in English?
- Where do I meet the guide?
- Where does the tour end?
- What kind of ticket do I need?
- How big is the group?
- Are food or drinks included?
- Is admission included for the stops?
- Can I cancel for a refund?
Key Takeaways Before You Go
- A tight 1h15 route that hits roughly 10 sights without long gaps
- Real variety: sea lions, the Cannery area, and WWII-era ships
- Value for $39 when you want built-in context and a timed walk
- Mobile ticket + max 25 people, so it stays manageable
- Musée Mécanique brings a surprising, playful break from the waterfront grind
A Fast Primer on Fisherman’s Wharf in 90 Minutes
This tour works when you have limited time and you want structure. At $39 per person and about 1 hour 15 minutes, it’s priced for “get the best hits with context,” not for a long, slow tasting stroll.
The route is designed to move. You’re not stuck waiting around at one stop while the rest of the day drifts by, and the group size cap of 25 helps keep things from turning into a slow shuffle. You’ll still be walking at a city pace, but it’s the kind of pace that helps you enjoy more, not just cover more.
I also like that it mixes postcard views with places you’d be less likely to notice on your own. If you’re the type who likes old tech, war history artifacts, and quirky local culture, you’ll get a lot of payoff here.
You can also read our reviews of more walking tours in San Francisco


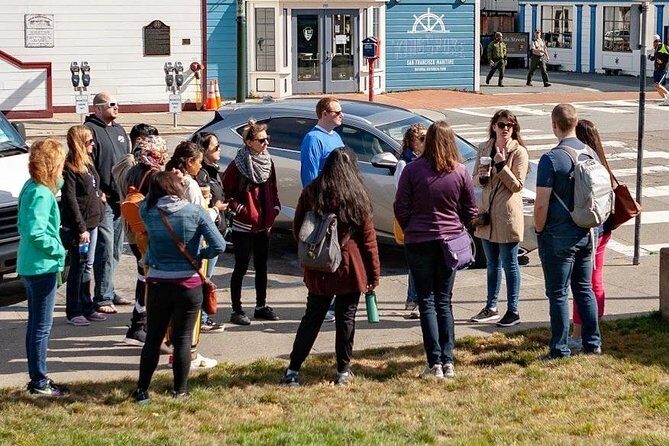
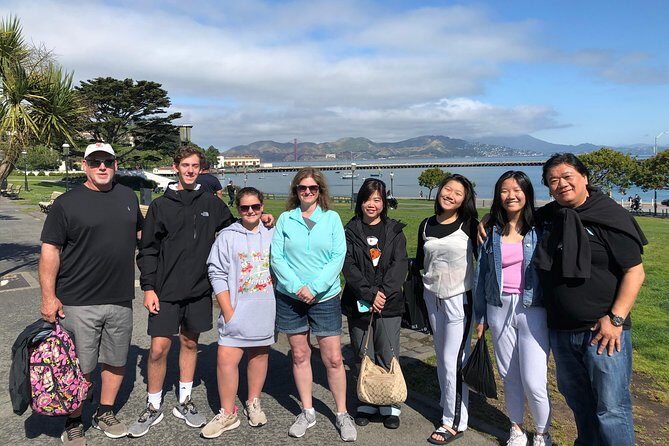
Meeting at 700 Beach St: How to Start Without Stress
You’ll meet at 700 Beach St, in front of the Welcome to Fisherman’s Wharf Sign by the cable car turnaround. That matters because Fisherman’s Wharf is easy to get turned around in, especially when you arrive at the same moment as a tour crowd.
Once you’re standing there, your next job is simple: stay with the group and listen early. The tour begins with waterfront scenery and quick orientation, so being on time sets you up to enjoy the rest instead of feeling rushed later.
And because it’s offered in English and uses a mobile ticket, you can keep your day simple. You won’t be spending time hunting for printed confirmations.
Aquatic Park to Cable Cars: Bay Views and SF Character
The first stop is Aquatic Park, where you get Bay Area views and an immediate sense of where you are in relation to the water. It’s a smart opener because it puts the geography in your head before the tour starts hopping from landmark to landmark.
From there, you go to the cable cars, which are more than a photo prop. Your guide connects them to the history of how San Francisco gets around, and you’ll watch them in action rather than only reading about them.
This section is also a good warm-up walk. You get quick wins early: scenic viewpoints, a sense of place, and a classic SF moving landmark that helps you feel like you’re in the real city, not just a theme park.
The Ghirardelli Moment: A Picture, Then Real Context
Then comes Ghirardelli Square, including the famous sign for that classic shot. This is the kind of stop that looks obvious from the street, but the guide’s job is to make it more than a quick stop-and-go.
Even if you’re not planning to shop or snack, the value is the way the tour threads local landmarks together so you understand how this waterfront neighborhood grew into what you see now. It’s one of those moments where a little explanation makes the place feel less random.
If you’re traveling with kids or you’re the group’s designated photographer, this is also a useful breather. You’ll have time to grab a picture and reset your feet before the next stretch.
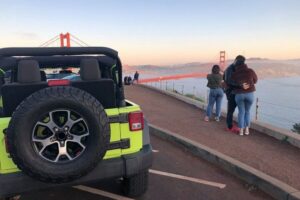
Golden Gate Bridge Views Without Losing Time
Next up: the Golden Gate Bridge viewpoint and photo op. The bridge is the big draw for many first-timers, so having a guide point you toward a good vantage keeps you from wandering and burning time.
One thing to know: you’ll likely be sharing viewpoints with lots of other people in this area. Still, the tour format helps because you’re not dealing with indecision. You arrive, you look, you take your photos, and you keep going—no endless circling.
If you’re sensitive to crowds, this portion is where you’ll feel it most. Plan to keep your camera ready and your patience handy.


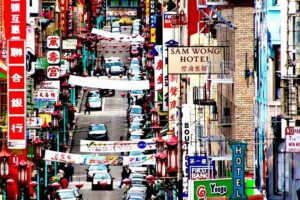
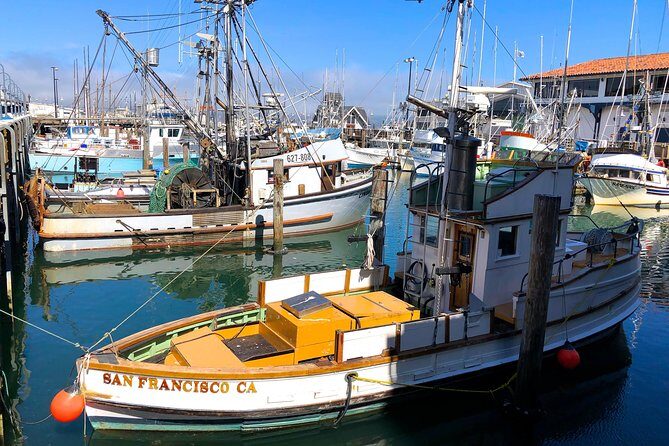
The Cannery and Fisherman’s Wharf: History You Can Walk
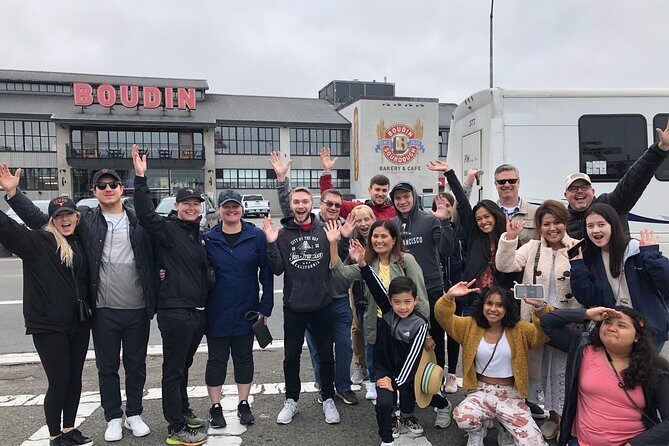
From there, you’ll visit The Cannery, including the old Del Monte Fruit Cannery building. This stop is more than bricks and storefronts. It’s the kind of place where you see how historic industrial spaces can become active, modern neighborhoods with restaurants, hotels, shops, and things to do.
After that, you move to Fisherman’s Wharf, where you’ll learn about it as one of San Francisco’s oldest neighborhoods. Again, you’re not looking at history behind glass. You’re walking through it, which makes the stories feel grounded.
Your guide also helps you connect the dots between what you see and why it exists. That’s useful if this is your first visit and you don’t want to spend hours researching before you arrive.
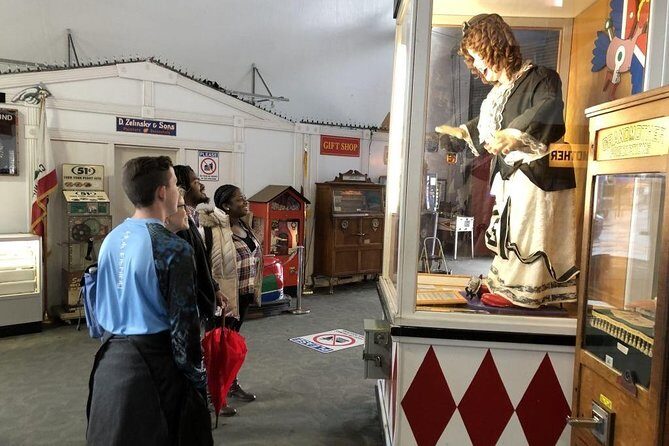
Musée Mécanique: The Quirky Arcade Stop That Works
Here’s the part I’d call the tour’s “pleasant surprise”: Musée Mécanique, the vintage arcade. It’s not just a cute side stop. It’s a fun break from the typical waterfront loop, and it gives you something to do in between big landmarks.
This is also a great stop if you like hands-on history. Instead of reading about how people spent time long ago, you get the chance to see the machines and get a feel for the vibe.
Expect this to be quick, because you’ll have other stops, but even 10 minutes here can add a lot of personality to the day.
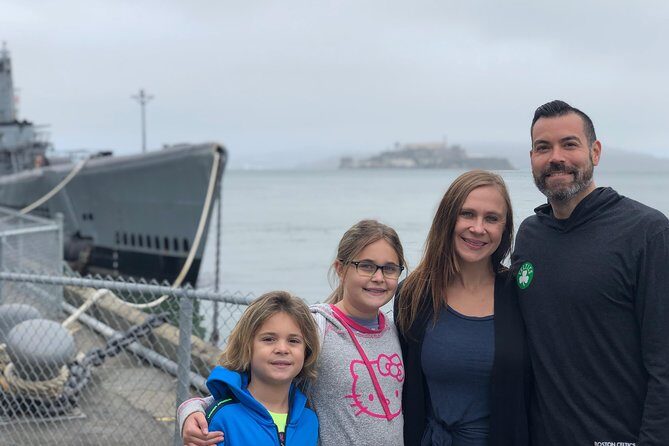
WWII Submarines: USS Pampanito and SS Jeremiah O’Brien

Then the tour turns a little serious with two WWII-era naval stops. You’ll see the USS Pampanito, an old WWII submarine, and later the SS Jeremiah O’Brien, a WWII-era naval ship that’s still functioning.
These stops are powerful because they’re physical. You’re not just hearing a story—you’re looking at machinery and hull shapes that changed warfare and training, even if you’re not a military-history buff.
If you’re traveling with teens, a history-minded adult, or anyone who enjoys museums but finds most of them too far from the city center, this is a standout portion. It’s also a different kind of souvenir in your mind: a vivid image of naval technology mixed into a day that started with sea lions and bridge views.
Angel Island Immigration Station: The Ellis Island of the West
Next: Angel Island Immigration Station, with views from Pier 41 in San Francisco. The tour frames it as the Ellis Island of the West, and that comparison matters because it tells you why this place hits emotionally, not just historically.
This stop adds depth to a day that could have stayed mostly scenic. You’ll get a sense of movement, migration, and the larger human stories tied to the West Coast.
Even if you’ve never visited Angel Island itself, this view-based stop gives you a foothold. You’ll understand why people talk about this corner of the Bay when they talk about immigration and identity.
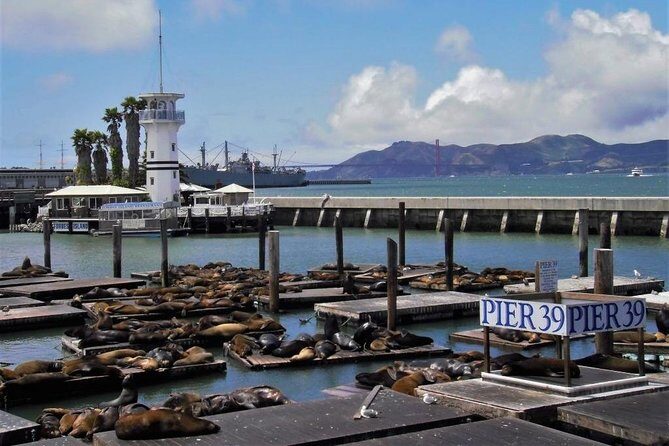
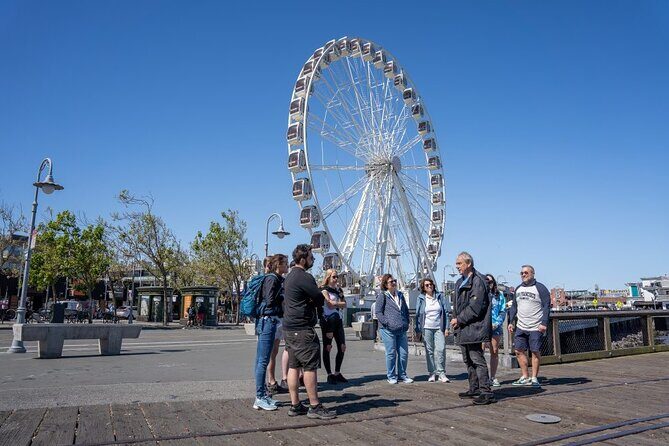
Pier 39 Sea Lions: The Classic End-Spot
You’ll finish with Sea Lion Center sightings at Pier 39, plus time around the pier itself. The sea lions are the headline here, but the guide also provides background so you’re not just watching barking animals without context.
Pier 39 is also a strong finishing location because it’s familiar and easy to transition from. You get views, noise, and energy—then you step out when you’re ready to grab food or keep exploring on your own.
This finale works well if you want your last walking stretch to be entertaining and visually rewarding rather than informational and museum-like.
Price and What $39 Really Buys You
At $39 per person, the value depends on your travel style.
You’re paying for:
- a timed route that covers about 10 stops in roughly 1 hour 15 minutes
- an English-speaking guide who connects the landmarks into a story
- free entry to the listed stops during the tour (many stops are marked admission free)
You’re not paying for:
- food and drinks
- anything like a private deep-dive at each location
If you’re visiting for the first time and you want to see a lot without planning every turn, this price is reasonable. If you already know exactly where you want to walk and you’re comfortable reading signs and building context on your own, you might feel the tour is optional—there’s some truth to that in how close together many Wharf sites are.
Still, I like the balance here: the route keeps you moving, but it includes enough variety that you’re not just repeating the same waterfront view with different signage.
Group Size, Pace, and Why the Guide Matters
The group max is 25 travelers, which is big enough to feel lively but small enough that you can still hear explanations. That’s an important detail on a walking tour. When groups are too large, even good guides get drowned out.
The pacing also matters. In this format, you get short stops with just enough time for photos and quick look-overs, then you move. That’s a plus if you like momentum. It can be a minus if you want to slow down at each landmark and linger.
The guide is also the difference between a tour that feels like a checklist and one that feels like a story. The strongest feedback mentions guides such as Marie, John Hurst, Seth, and Jamie for clear information and enjoyable pacing. If you land with a guide who keeps things moving and explains what you’re seeing, the whole day feels smoother.
Who This Tour Suits Best (and Who Might Skip It)
This is a good fit for:
- first-time visitors who want a fast, structured introduction to Fisherman’s Wharf
- people who like variety: waterfront views, quirky attractions, and historic ships
- families who want a mix of big landmarks and fun stops like Musée Mécanique
I’d think twice if:
- you already plan to self-walk the Wharf at your own pace with no interest in guided context
- you get bored or distracted easily and prefer more time at each stop
- you’re looking for a very slow, relaxed experience rather than a brisk route
If you want maximum flexibility and personal attention, there’s also an option for a private tour. That can be worth it when your group has specific needs or you want a bit more control over how long you stay at each location.
Quick Practical Tips to Make It Better
Bring shoes you trust. You’ll be on your feet for the bulk of the tour, plus the Wharf can be uneven in spots.
Have your phone or camera ready early. The cable cars and Golden Gate viewpoints are time-sensitive moments, and you’ll want to capture them without slowing the group down.
If you care about food later, plan it after the tour. The tour doesn’t include meals, so use the end of Pier 39 as your cue for what to eat next.
And if you’re sensitive to crowd noise, keep your expectations realistic. Pier 39 and the surrounding areas get busy.
Should You Book This Fisherman’s Wharf Walking Tour?
I’d book it if you’re short on time and you want a guided route that balances big sights with genuinely different stops. For $39, the combination of Musée Mécanique, the WWII ship stops, and the sea-lion-and-pier finale makes it feel more complete than a simple Wharf walk.
I would skip it if you’re confident you’ll enjoy the Wharf just as much by wandering on your own, because many major landmarks are close together. In that case, you’d be paying mainly for structure and explanations—which can feel optional if you love independent exploring.
FAQ
How long is the Fisherman’s Wharf walking tour?
It runs about 1 hour 15 minutes.
How much does the tour cost?
The price is $39.00 per person.
Is the tour offered in English?
Yes, it’s offered in English.
Where do I meet the guide?
Meet at 700 Beach St, San Francisco, CA 94109, in front of the Welcome to Fisherman’s Wharf Sign by the cable car turnaround.
Where does the tour end?
It ends at Pier 39, concluding at the Crab House at Pier 39, 2 Beach St, San Francisco, CA 94133.
What kind of ticket do I need?
You’ll use a mobile ticket.
How big is the group?
The tour has a maximum of 25 travelers.
Are food or drinks included?
No. Food and drinks are not included.
Is admission included for the stops?
The listed stops are marked as free admissions within the tour route (many show Admission Ticket Free).
Can I cancel for a refund?
Yes. You can cancel for a full refund up to 24 hours in advance of the experience start time.